There’s something about putting heavy weight over your head that empowers you. But getting to the point where you have considerable weight over your head takes time, patience, and practice—at least if you’d like to do so in a safe manner.
There are a number of ways you could develop the overhead strength you desire. The most basic is a linear progression with a given weight and a given exercise. For example, choosing the military press, a load you desire, and training within a given number of sets and reps with that weight. Having just returned from Plan Strong, I can tell you there is a much more effective way to reach your goal that includes variability, waving the load, and a lot of “third grade math,” as Pavel says. But before you can even commit to a program, you have to understand the lifts you’ll be potentially training, and the pros and cons of each.
So in an effort to empower you, I’m going to discuss three lifts: the get-up, the bent press, and the military press. Individually, each is a solid option for building overhead strength, but when you use them together, you’ll not only wind up with seriously healthy shoulders, but you’ll get some serious weight over your head as well.
The Common Denominator: The Kettlebell
The main thing in common for all three lifts is the tool involved. The kettlebell offers a unique ability to strengthen the shoulder due to its shape and structure. Essentially a cannonball with a handle on it, when the kettlebell is held in the rack position and pressed overhead, it actually helps the shoulder sit in a packed position. This allows for an optimal overhead lockout and development of strong, healthy shoulders.
For the sake of not repeating myself, just know this effect will carry over into each of the three lifts discussed below. If you want to investigate further, Chief SFG Brett Jones wrote an article discussing why simply using a kettlebell for overhead movements could help develop strength and maintain healthy shoulders. Click here if you’d like to read it (after you finish this article, of course).
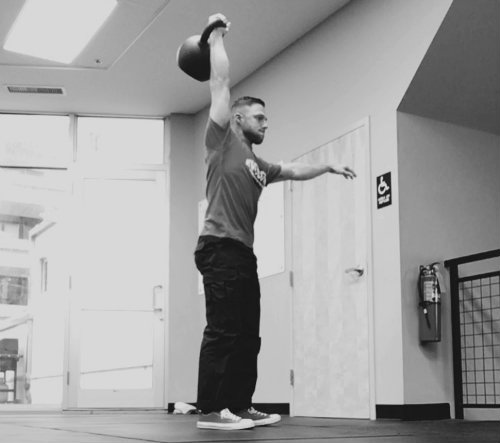
Lift #1: The Military Press
The military press is likely the most common way you’d think about putting heavy weight over your head. Most do it with barbells, some do it with dumbbells. It’s a great choice and one that covers the full range of motion that’s needed to press weight overhead. It has its downfalls, but let’s start with the benefits.
- Out-of-the-Hole Strength: If your goal is military press related—for example half or one-third bodyweight—you’re going to need starting strength, or out-of-the-hole strength to get the bell moving. For this reason alone, I’d say you need the military press to transfer into, well, a strong military press.
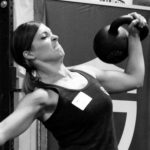
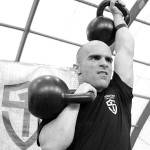
- Rack Strength: In order to military press with a kettlebell, you need to have the ability to hold the bell in a clean, or racked, position. This requires a certain amount of strength to begin with and should thus self-limit you from using loads that are too heavy. A strong rack will also allow you to seriously grind out a rep.
Where the military press falls short, in my opinion, is developing optimal shoulder stability and health when compared to the other two lifts discussed in this article. In both the get-up and bent press, the lifter moves around a stable shoulder rather than simply pressing the bell up. In its most regressed form, think of the arm-bar, but with five, six, or seven times the load! So, consider the military press a starting ground. There is additional value to be found in its variations, and we’ll talk about those more at the end of this article.

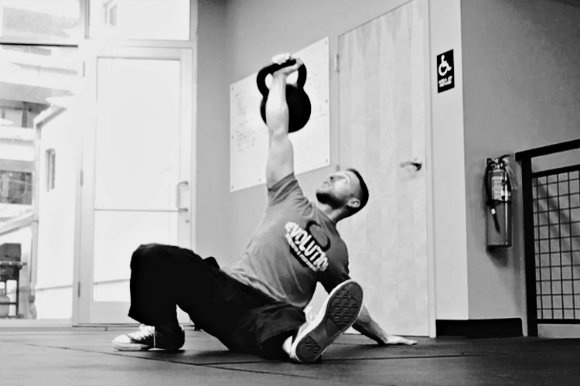
Lift #2: The Get-up
The get-up is a favorite of mine—actually, my Simple & Sinister results are what inspired me to write this article. For those of you who aren’t familiar with S&S, shame on you—go investigate and just know for now that it involves swings and get-ups.
After just three months of Simple & Sinister, I’ve seen a significant carryover into many lifts I haven’t trained in quite a while—but pressing is not one of them, at least directly, and here’s likely why. As mentioned, pressing requires you to start from a position in which the elbow is flexed and then you simply drive up (or wedge under, depending on how you think of it). The get-up does a great job at stabilizing the shoulder—again, moving around a stable shoulder —but at any given point in the get-up there should never be a bend in the elbow.
However, while I haven’t seen my press go up, I have seen my ability to drive past a sticking point vastly improve. This helped me waiter’s press the 32kg the other day – just a bell down from my 1RM press of a 36kg. I attribute this to the overhead lockout that can be attained in the get-up with significantly heavier loads than can be pressed.
The get-up is an exercise that has multiple benefits that go far beyond pressing. If you’re looking to put heavy weight over your head, I’d start by perfecting the get-up. You’ll be able to practice putting heavier weight overhead with one arm easier with the get-up than the military press. You’ll also develop a rock-solid core, and you’ll need that strength for a maximal press.
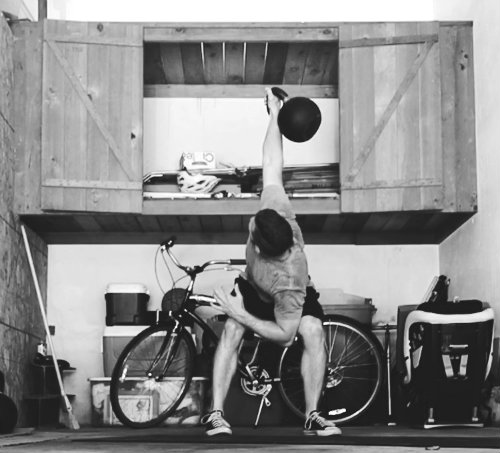
Lift #3: The Bent Press
The bent press is more about getting under the weight than it is pressing the weight overhead. But let’s recall the out-of-the-hole strength needed in the military press and the lockout strength we just talked about in the get-up—in my opinion, the bent press brings both of these components into one, beautifully executed lift.
In the bent press, the bell should hardly move (in height) from its racked position to its overhead position, you simply wedge yourself under the bell and stand up. This wedging movement is what develops some seriously strong and healthy shoulders, while at the same time training you to get under a bell rather than push it away from you. You’d be surprised how much extra strength you can squeeze out by simply implementing this tip.
I certainly wouldn’t consider the bent press a beginner’s move, but at the same time, if you have sufficient shoulder and upper back mobility, then I don’t see it as a move you should avoid learning. Its technicality would be the only downside I see to this lift. Aside from that, this is a fantastic movement for putting appreciable weight over your head.
Much like the get-up, the bent press is total body lift and develops total body strength. If your goal is to military press a particular bell—again, say half or one-third bodyweight for your SFG Level II Certification—then I’d start by taking a multifaceted approach and perform some get-ups and bent presses.
Variety Is the Spice of Life (and Programming)
The military press, get-up, and bent press are three great ways you can put heavy weight over your head. Of course there are other ways, such as a snatch and jerk, but from a grind standpoint, I’d consider these three to be the top of the pyramid.
Outside of the standard versions of these lifts, you have their variations—what we can call specialized variety. These would be considered “the same but different.” I’d include variations such as the waiter’s press and bottoms-up press in this category. It’s the use of these specialized variety drills that I’ve found to have a huge carryover into my traditional overhead lifts.
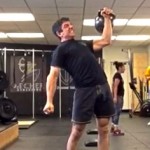
The waiter’s variation in particular happens to be one of my favorites. It forces you to maintain a vertical forearm (a key element in pressing). Fail to maintain a vertical forearm and you ditch the bell—watch out for those toes. While they might be a little riskier, I find waiter’s variations to be well worth the reward in the form of increased shoulder stability in your get-up, military press, and bent press.
Put It Together and Build Overhead Strength
There’s a lot of information here, and if you’re like me, you’ll want to do all these lifts. So my advice to you is this:
Pick a program that’s sustainable—meaning, you will be able to consistently complete training sessions for a prolonged period of time (two to three months, at least). The StrongFirst website has a number of pressing plans you could follow, there’s Simple & Sinister for your get-ups, and there are bent press plans available in Taming the Bent Press.
Pick one program and follow it. While the waiter’s variations sound fun (and they are), don’t get carried away and transition the program to be about your waiter’s press, waiter’s get-up, or waiter’s bent press. Use it as variety—a spice, so-to-speak. I wish I could tell you exactly when to throw this spice into your program, but I’ve always done best in feeling things out and listening to my body.
You stand your best chance at developing overhead strength by getting seriously strong in the get-up and bent press. When viewed as an analogy to a car:
- Your frame comes from the get-up
- The mechanical workings come from the bent press
- The paint job, rims, and shiny stuff come from your military press
This could be a bit extreme, but you get the point. None of these lifts are bad; I also wouldn’t consider one to be superior to the other. But when combined, I do feel you get the entire package of overhead strength coupled with healthy, resilient shoulders. I’m confident that if you train these three lifts, you’ll wind up putting considerable weight over your head in no time.
Be STRONG!
You may also like:
Along with his general population clients, he has worked with a variety of professional athletes including players in the NFL, NHL, and MLB. Additionally, he’s found training with kettlebells, eating really healthy, and having a darn good time in the process does a lot of good for the people he works with.
Chris owns and operates a personal training company called Evolution Strength and Performance out of Santa Monica, California. He followed a 21-week Simple & Sinister program that got him to “Sinister” status. You can follow his journey on Facebook and Instagram. Chris also has a weekly blog. For more information, visit his website.


