“Details are the difference between good stuff and great stuff.”—Stephen Brewster
The kettlebell windmill exemplifies this quotation. Details in the setup and execution of this exercise can make it great.
While there are many videos on YouTube and it has been a somewhat popular exercise since Pavel (re)introduced it to the fitness world with his original kettlebell book, there are still many “interesting” variations of the kettlebell windmill out there. The goal of this article and video is to provide some clarity.
What Is the Kettlebell Windmill?
The kettlebell windmill is essentially a loaded stretch and strengthening exercise.
What does it stretch? The hip (piriformis and hip rotators) really should be the main focus of the stretch, with maybe some hamstrings. The movement requires good t-spine mobility (but may not build it). And, there may be some stretch for the anterior chest.
What does it strengthen? There is a lot of focus on the midsection (the much ballyhooed “core”), but the exercise also works on scapular/shoulder stability. Hip and posterior chain are stretched on the way down, but get to work on the way up so there is strengthening there, as well. Heavy windmills (single or double kettlebell) obviously increase this effect.
Breaking Down the Kettlebell Windmill
Stance:
- Feet inside of shoulder width (a wide stance prevents the “shift”—more on that in a moment)
- Feet angled 45 degrees away from the arm holding the kettlebell overhead
- This is a starting point and can be adjusted to fit the individual
- Do not step or shuffle the feet—angle the feet by turning on the heel or ball of the foot respectively
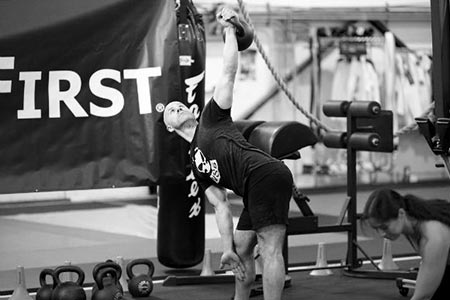
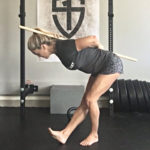
Execution:
- Begin with the “shift and lift.” Shift the hip that is under the kettlebell back at a 45-degree angle to get the leg vertical and then focus on lifting that hip and making the leg as tall and long as possible while the front leg is “soft” with a bent knee. The rear heel should not rise as you try to make the leg tall. Picture a 70/30 weight distribution with 70% on the back leg and 30% on the front.
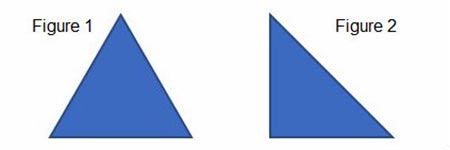
- The upper body should extend in a straight line off the hips and if the emphasis is on the “shift and lift” with the hip at the 45-degree angle, then the upper body will fall into that 45-degree channel. The t-spine will rotate so the arm holding the kettlebell (or reaching for the sky in the low windmill) is vertical.
- There is to be no lateral flexion of the spine or stress on the lumbar spine.
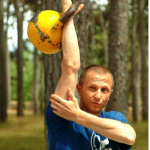
- The “free arm” can either reach for the ground (although touching the ground is not the goal) or provide a guide by riding down the inside of the front leg. Another position for the free arm is to place it behind the back. This will put more emphasis on opening the chest and t-spine.
- How deeply you go into the windmill position will be determined by your “mobility ability.” You should not laterally flex the spine or change the positions to go deeper than is appropriate. Build the depth over several repetitions and practice of the drill.
- The weight distribution should stay consistent. Once you set the 70/30 (rear to front) distribution during the shift, it should remain there for the duration of the repetition. Do not let the weight shift to the front foot in order to feel like you are going deeper.
Begin by practicing the windmill as a bodyweight drill, then the low windmill, and then progress on to the full overhead kettlebell windmill. The double kettlebell windmill can be used for more advanced students.
A Special Note on Searching for the Stretch
I have found that in the windmill students can go “searching” for an “expected” stretch. And what usually ends up happening is a deviation from the exercise technique in order to find that stretch.
In the windmill, students expect a stretch in the hamstrings, so they turn the windmill into a variation on the “good morning” exercise, overemphasizing the “reach with the hips” concept to find that stretch.
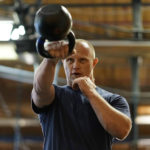
Fourth wall break: I’m sure you are asking yourself, “Self, does this searching for a stretch happen in any other drills?” Well, I’m glad you asked. In the arm bar, students expect a stretch in the shoulder or t-spine, so they allow the kettlebell to drift back behind the body (overstretching the anterior part of the shoulder) instead of maintaining the vertical position of the arm. Also keep in mind that the position of the arm holding the kettlebell in the windmill follows these same guidelines.
Proper execution of a drill is/should be the goal and where the individual student “feels” the effect of that drill can and will vary based on individual structure, restrictions, or hyper-mobility. Always be sure the focus is on the execution, not the expectation.
Programming the Windmill
I would consider the kettlebell windmill to be a bit of a “spice” as opposed to a “main dish” exercise. Just a dab’ll do.
Simple ways to include the kettlebell windmill:
- Superset with the get-up: get-up x 1+1 superset with windmill x 3+3, perform 2-5 supersets.
- Simply add one to two sets of 3-5 reps on each side after your get-ups. You are doing your get-ups, aren’t you?
- Finish your practice session with one to two sets of 3-5 reps of kettlebell windmill on each side as a good loaded stretch and unwinding drill.
Avoid performing the windmill under fatigue and do not seek to max out this exercise.
Conclusion
The kettlebell windmill is an important drill to help stretch the hips and keep the stress of the hip hinge ballistics from creating tightness and imbalances at the hips. Especially if we are using the Lock and Rock to adjust to the individualized foot position since using the outturn of the feet can encourage tightness in the hip rotators.
Windmills can provide a loaded stretch to these rotators and help to balance the stresses on the hips. Add in the strengthening of the midsection and shoulder stabilization and you have a powerful exercise. But the details take this exercise from good to great.
You may also like:


With over twenty years of experience, Brett has been sought out to consult with professional teams and athletes, as well as present throughout the United States and internationally.
As an athletic trainer who has transitioned into the fitness industry, Brett has taught kettlebell techniques and principles since 2003. He has taught for Functional Movement Systems (FMS) since 2006, and has created multiple DVDs and manuals with world-renowned physical therapist Gray Cook, including the widely-praised “Secrets of…” series.
Brett continues to evolve his approach to training and teaching, and is passionate about improving the quality of education for the fitness industry. He is available for consultations and distance coaching—e-mail him for more info.
Brett is the author of Iron Cardio.
Follow him on Twitter at @BrettEJones.


Any reason to not keep the front knee locked out? This seems to keep the weight in the back leg, whereas with a bent knee I can feel myself shifting into the front leg a little more than I want to. Thoughts?
Mark
For most folks when they straighten the front leg it turns into a “Good morning” style movement where the emphasis is only “back” (usually searching for a hamstring stretch)
instead of shift to center the weight on the back leg and then the focus on the “lift” (where a hip stretch is found)
So nice to see some clarification on the important points of the movement. This is one of those movements that popular media seems to be all over at the moment, which is great for getting people to try, but also leaves an open door to see numerous “versions” of the actual movement.
many thanks
Thank you everyone
Amazing article !!!
Windmill is a key exercise … I really like it and now matching with TGU gets better yet …
The explanation about the hip angle helped me a lot !!! thanks chief
Get-ups, windmills, bent presses – my favorite group of exercises. Thank you Chief, great article.
Great article. Inspires me to go back to trying windmills again. The discussion of joint angles is very helpful. Thanks, Brett.
Get Up+Windmill is one of my favourite combos. I Bottom Heavy Windmills a lot, but I never do them anymore.
I do tons of windmills great lift thanks for the great advice. 🙂