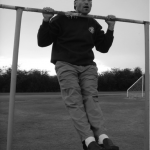
At StrongFirst, we are breaking down the myths that ladies cannot do pull-ups and proving that pull-ups are not only for men, but a skill for everyone.
The standard taught at our Bodyweight Courses and SFB Certifications is the tactical pull-up. We believe the tactical pull-up to have the most carryover strength to other skills. A tactical pull-up is performed with a thumbless overhand grip while maintaining a hollow body position. When you train your pull-ups in this manner, you will begin to notice a stronger core, increased grip, and amazing lat development.
“The thumbless overhand grip makes it easier to recruit the lats and apply the corkscrew” – Pavel
But how do you train the pull-up if you don’t yet have a pull-up?
In this article, I’m going to share a few progressions for those who have not yet obtained their first pull-up. If you are a beginner just starting your pull-up journey, have no fear—not only will these progressions get your journey off to a great start, but you will also gain amazing core strength and stability.
NOTE: Do not discard this article just because you can do pull-ups. These same progressions will strengthen your current pull-up numbers and even advance them.
Step 1: The Hollow Position
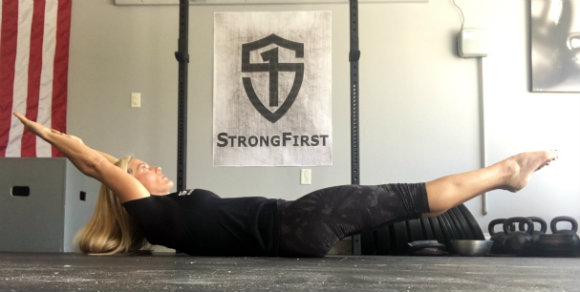
In the tactical pull-up, our goal is to maintain a hollow body. Therefore, the hollow hold on the ground is the best place to start building your solid foundation. Watch the video for a demonstration of the hollow body position on the ground, as well as instruction on regressions and more advanced versions:
As in any skill set, it is best to perfect a solid static position and maintain tension before adding movement in the position. We begin with the hollow hold as you see in the video above. After you have mastered this position and can maintain contact between your low back and the floor, then you can progress to adding resistance.
You can add resistance in several ways, but the most common options would be to have a partner lightly press on your hands or to press into a heavy bar or sofa (something heavy enough that you cannot actually move it). These would be considered isometric holds, in which you are building up holding time under tension.
Once you are ready to advance to moving your hollow body as one unit, add hollow rockers into your training as demonstrated in the video below. I recommend building up to 3 sets of 20 reps performed two to three times per week at a minimum. Watch the video for a demonstration of hollow rockers and also common mistakes to look for.
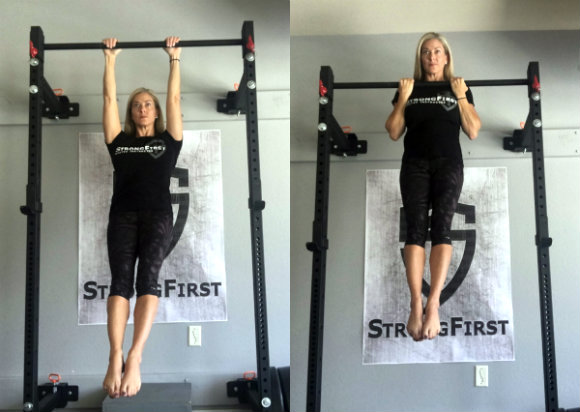
Step 2: The Hang Position
Next, you are ready to add load to your hollow body by hanging for time. If you haven’t tried hanging for time before, it may not seem like you’ll be doing much, but it’s actually a great way to train your stabilizing strength.
There are a few progressions of the hang position that can help you improve this strength:
- Hollow Hangs: The hollow hang is a straight-arm hang while maintaining the hollow body position. You should contract your lats and keep your shoulders connected for the duration of the hang. The hollow hangs will be performed in a shoulder-width overhand thumbless grip.
- Flexed Arm Hangs: The flexed arm hang is a bent-arm hang with your chin and neck above the bar while maintaining the hollow body position. As with the hollow hangs, you will contract your lats and connect your shoulder, but the flex hang is done in a narrow underhand grip as this position is more shoulder friendly.
One you have built up some solid training time with the hollow hangs and flexed arm hangs you can advance to weighted hangs for even greater strength gain.
- Weighted Hangs: Hangs can be weighted in several ways, but it is most important to train smart and not progress too heavy too quickly as this could easily aggravate your elbows.
Ways you can weight your hangs:
- Weighted vest
- Kettlebell placed on your foot
- Kettlebell or plate attached to a weight belt
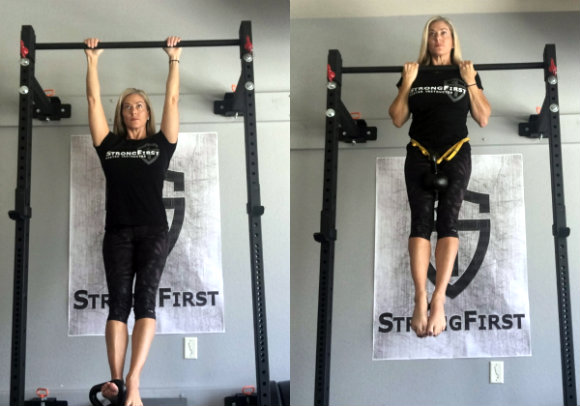
Weighting your hangs is a great way to gain strength, whether you are working toward your first pull-up or training to increase your current rep max. When you return to training bodyweight pull-ups, your body will feel lighter. Try testing your max reps of pull-ups after doing weighted hangs for a while and see what I mean.
Training to increase your hang time on the bar will add to your pulling strength also. After running many case studies, I have found the following averages:
- Building up to a 45-60 second hold will allow you to own one chin-up
- Building up to 3 chin-ups will allow you to own one pull-up
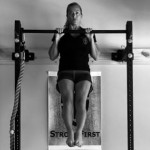
Step 3: The Tactical Pull-up
Here’s what you’re aiming to achieve and the form you should strive for in your tactical pull-up. This is good for you to keep in mind even as you’re working your way up through the progressions and working toward your first pull-up. Watch for an explanation and example:
The StrongFirst SFB standards for the tactical pull-up:
- Stand under the bar at a height that you can dead hang without your feet dragging on the floor
- Without looking at the bar, grip the bar at about shoulder width with a thumbless overhand grip
- Contract your lats and pull your shoulders into their sockets
- Squeeze your legs and feet together to produce the irradiation effect
- Posterior tilt your pelvis to “point your belly button toward your sternum”
- Tense your glutes
- Pause momentarily in a hollow hang
- Inhale as you initiate the pull
- Keep your gaze forward during the duration of your rep—do not look at the bar
- As the bar begins to pass your face, exhale with a tension breath and forcefully drive your elbows down and back to get higher over the bar
- Pause momentarily in the top position with the bar touching your neck or chest
- Slowly lower in an active negative back to the dead hang position
As discussed in each part of my One Good Rep series, the grease the groove method is the best method for training single repetitions for amazing strength gains and setting a solid foundation to build upon. The pull-up is no exception.
Simply place a pull-up bar in an area or doorway that allows for frequent use. Each time you pass the bar throughout the day, perform one good rep. Using the grease the groove method means you are staying fresh and performing many quality reps—one at a time. The volume of quality reps you will be getting in will allow for rapid strength gains.
Don’t Underestimate These Progressions
If you already own a solid pull-up, these progressions can and should still be added into your training program as they will increase your bodyweight numbers or advance you to heavier weighted repetitions while maintaining stellar form.
Don’t disregard the “simple, not easy” holds for time, otherwise you will be missing out on impressive strength gains at each phase of the pull-up, from start to clearing your chest well over the bar.
These are just a few of the progressions we teach at the StrongFirst Bodyweight Courses and Certifications. If you are looking to master this movement, I recommend checking the schedule for upcoming events or contact an SFB in your area.
You may also like:


Karen currently resides in Dallas where she is available for private and group sessions. She is also available worldwide for distance coaching and program design. She travels regularly instructing workshops and StrongFirst Courses and Certifications.
She can be reached at karensmithmsfg@gmail.com or at her blog, Coach Karen Smith.


Hi all.
How do you breathe when doing the hollow hangs and flexed hangs? Do you have to hold your breath? Or breathe normally or is it somewhere in between? Please do answer.
Sorry for the reply delay, as for breathing I would recommend that you breath behind the shield (comfortable breathing, Do not hold your breath)
Great article
This really a helpful progression. Thank you for the article.
Great article and textbook demos! Can you explain in further detail why there is more Lat engagement with an open hand grip?
My thought was that an overhand grip, thumb around the bar with external shoulder rotation to engage the Lats – like an overhand DL grip.
Thank you for your time.
Sincerely,
Joe D.
You can wrap your thumb around the bar if you choose, however we teach the tactical grip as it allows for better carryover if you should have to climb over a wall etc. Which is really great for those with jobs that may require it. Ex. Military, Law-Enforcement, Fire Fighters or even weekend Spartan obstacle racer (or something similar).
This is the same reason we do not teach kipping pullups as they would not help you in a tactical situation.
Thank you Karen for this long awaited article on getting your first pull up!
Weighted Negatives and Band Assisted Pull Ups have done great things for my clients. I do like the idea of weighted hangs too!