The barbell front squat is a very effective squat variation, and when compared to the back squat, is just plain hard work. In addition, the carryover to sport and life cannot be ignored. From the StrongFirst SFL Barbell Certification manual:
“For most athletes the barbell front squat is a better choice than the back squat (unless hypertrophy is the top priority). The FSQ allows one to fully extend the hips and it enforces a better technique (the back squat is a lot easier to cheat on by coming up tail-first). The front squat places relatively more stress on the quads than the back squat. As the bar can be dropped, the FSQ does not require a spotter or a power rack.”
The hamstring and gluteal muscles are also utilized during this exercise, but because the center of gravity of the weight is shifted forward on the body, it tends to place more stress on the quadriceps, thereby developing them even more.
The shin angle in the front squat will have more forward inclination when compared to the back squat, where it has more of a vertical shin. This allows more knee flexion to occur, stressing the quads even more. This by no means puts undue stress upon the knee joint, as long as the lifter goes below parallel with each repetition. Not going below parallel will tend to stress the knee joint and not activate the gluteus maximus completely.
The Three Front Squat Rack Styles
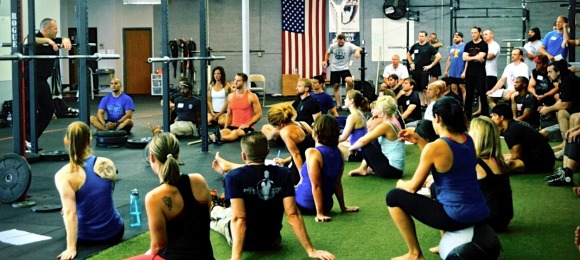
There are three different rack styles of the front squat taught with the StrongFirst Lifter (SFL) Barbell Certification:
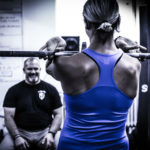
- The bodybuilding rack, which utilizes a crossed-arm position.
- The traditional weightlifting rack, which is the standard rack you will see in most gyms and facilities around the world, and especially in weightlifting competitions.
- The third style we teach is what I term the powerlifting rack, which is a hybrid of the weightlifting rack, utilizing lifting straps to help hold the bar.
The bodybuilding rack is for those who do not have the requisite shoulder, elbow, wrist, and lat mobility to hold the weightlifting rack position. It can also be used for someone who doesn’t have much interest going very heavy in the front squat. There does seem to be a limitation of the bodybuilding rack in regards to how much weight one can utilize in this position because of the stress on the shoulders, even when placing the barbell in the proper position on the clavicle.
The weightlifting rack does require good shoulder, elbow, wrist and lat mobility and even thoracic mobility. The other rack positions require good thoracic spine mobility as well, but this one even more so. Please understand: developing a good weightlifting rack will take time if you are not able to achieve it right away. You may have to start with the bodybuilding rack while concurrently working on your weightlifting rack mobility, eventually moving toward the weightlifting rack.
One advantage of the weightlifting rack is the ability to place the barbell on the clavicles. This helps to center the load over the body better. With the bodybuilding rack, it is more difficult to achieve this position. The powerlifting rack utilizes lifting straps to create a sling underneath the barbell. While it is difficult to describe it in written word, the lifter is basically using the lifting straps in lieu of the fingers to help hold the barbell in the proper position on the clavicles. This decreases the amount of elbow flexion and wrist extension that is necessary to be able to hold the barbell.
I personally have gone up as high as 350lbs x 5 using the powerlifting rack. I have not been able to successfully perform the weightlifting rack, partially due to my powerlifting training, with emphasizing my triceps for the bench press and starting to front squat later in life. Once you get used to it, it feels very comfortable.
Requisite Mobility and the Goblet Squat
Good thoracic mobility is a given to be able to do the front squat properly. We utilize and teach several mobility drills at the SFL to help develop this, everything from thoracic mobilization using foam rollers and yoga blocks, to the StrongFirst arm bar, to the Brettzel. We also recommend utilizing various stretches to assist with this. If you are not able to hold an upright position without having to excessively lean forward and drop the bar, I recommend working on the goblet squat and/or the back squat until you’re able to develop the requisite thoracic mobility to complete the task.
Before we progress a lifter to the barbell front squat, I want to see a very strong and adequate goblet squat. The ability to maintain a flat spine is essential to improve performance and decrease injury. No tucking under at the bottom with the buttocks/sacrum is recommended, thereby putting undue stress on the lower lumbar spine. If you are rounded and/or have other issues with the goblet squat, you have no business going to the barbell front squat until you are able to complete the task.
Once you are able to perform a goblet squat properly, graduating to the barbell front squat is next. One does not have to goblet squat heavy, meaning 48kg, to move one to the barbell. A lot of training sessions I will do goblet squats as a warm-up exercise to help with my hip mobility. I will use something as small as 12 kilo to help with that.
Good ankle dorsiflexion is also needed in the front squat since the shin angle has increased in comparison to the back squat, which optimally uses a near vertical shin.
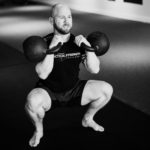
Barbell Front Squat vs. Double Kettlebell Front Squat
The barbell front squat is different in comparison to what we teach in the SFG Level I with the double kettlebell front squat. You definitely need more thoracic mobility as the shoulders and elbows are flexed and up, parallel with the ground, and your body is more upright with the weight, whereas in the kettlebell front squat the elbows are pointing at the ground.
Because you are staying more upright with the barbell front squat, you will find increased abdominal activation as you are maintaining an upright posture and not letting the weight drop. One of the things that always amazed me when I was doing a lot of heavy front squatting was how sore my abs became. I never realized how much your abs are contracting to hold you upright during the front squat. You are keeping the cylinder upright, almost ninety-degrees to the floor, maybe a slight five-degree forward inclination. When watching other lifters perform the barbell front squat, you will discover when they come out of the hole, some will have a tendency to drop the elbows and/or drop the head, and the bar will start to come forward. This indicates either a lack of strength of the torso to stay upright or a lack of thoracic mobility or both.
Barbell Front Squat vs. Other Lifts
One of the advantages, in a safety sense, of doing a front squat versus a back squat is you don’t need spotters. If for some reason the weight starts to get heavy or comes forward and you don’t feel you can complete the rep, just dump it in front of you, step backward, and get out of the way. In the back squat, this is more difficult for obvious reasons.
When front squatting, there is more knee flexion and hip flexion when compared to the good morning or kettlebell swing. During the front squat, we like to see the tailbone point somewhere between 6:00 and 7:00 at the end of the movement, whereas in a good morning or kettlebell swing, the tailbone will point at ~9:00. When you descend in the front squat, you are not just pushing the butt backwards, you are pushing the butt backwards and down.
During the back squat, knee flexion is a secondary motion because of the hip flexion occurring. In the front squat, you will be flexing the knees and the hips at approximately the same time and to the same angle. The neck position during the front squat is that of a neutral neck with a chin tuck. There is retraction of the skull on top of the spine, activating the deep cervical neck flexors and not going into a hyperextension during the front squat.
The Most Common Cue to Remember
One of the common cues that I use with lifters during the descent is to “keep the elbows up.” Maintaining the upper arm parallel to the ground as much as possible allows you to keep the elbows up and not dip down. Keeping the elbows up throughout the lift ensures you are keeping your thoracic spine and your shoulders up at the same time. This helps to decrease any forward leaning when you come out of the hole. If you start to dip the elbows down, unless you have a very strong midsection, the bar will end up dumping or the bar will come forward enough to cause rounding of the back and putting yourself in harm’s way.
The Importance of a Proper Set-up
One of the things that we emphasize strongly at the SFL is to make sure your set-up is where it should be. It is similar to when I coach youth football. One of the things we always teach is form and technique. We spend a lot of time in the first few weeks of a new season of junior high football working on form, technique, and stances. I am not concerned at this point if a young man can fire out of their stance quickly. I want him to be able to get into a good three-point or four-point stance. Once he gets his set-up down, then his chances of success are much greater. Same thing as far as the front squat is concerned. We want to make sure you get your hand position, shoulder position, etc., where it should be.
When you get underneath the bar, you want to wedge yourself strongly. Don’t take this lightly. You will hear those two words—“wedge yourself…”—quite a bit at the SFL. Get that bar on your collarbones. The bar should be placed as close to the throat, on top of the collarbones, as possible. At first it will be uncomfortable, but you’re going to have to get used to it. You are not going to hurt the collarbones or your AC/SC joints at all.
As you are getting yourself properly wedged under the bar to prepare to lift it off the rack, make sure there are five to ten degrees of knee flexion once you are properly set-up underneath the bar. Mid-chest level is a good approximation. I see too many lifters get underneath the bar and not allow themselves enough knee flexion to properly stand up with the bar. The bar is set too high. By allowing the five to ten degrees of flexion, this makes sure that by extending the knees fully before stepping back, it helps to elevate the bar past the hooks in the rack, thereby stepping out in a safer manner.
You want to become one with the bar. When you are moving that bar up and backward, it is your body weight plus the weight on the bar. It is not two separate things. It is one unit, until you rack that weight.
The second part of this set-up is walking back. I make a strong point to make sure that when you are walking back with the bar that you look robotic. Robotic to the point where you are standing up with the bar first, getting to the terminal knee extension, then stepping back, with small steps, with one foot then the other. Line themselves up and then achieve your proper width that you have been practicing with.
The Take-Away With Front Squats
Front squats have a huge carryover to sports and helping the athlete improve their performance and decrease injury. For example, a downhill skier would benefit tremendously from using front squats in their training. Skiing is a quad-dominant type of movement. There is always knee flexion to absorb the forces from the terrain when coming down the hill. Strengthening the lower extremities with the front squat will immensely help with that. Hockey and football players will also benefit.
Even for sports that are single-leg dominant, such as tennis, where you are having to lunge quite a bit, and golf, with the shift in body weight from side to side, athletes participating in these sports will benefit greatly from doing heavy and medium front squats. The core stability and the strength created throughout the body while training front squats is immeasurable.
So the take-away with the front squat is:
- Come to the SFL so you can learn how to do front squats properly;
- When you are doing them, take your time getting set up.
Again, I will always, always emphasize this last point. One person at the last SFL called me Dr. Set-up and I had to laugh at that. But one of those things I have learned over the years is to always put yourself in the right position to succeed. Don’t get in a position where you’re going to fail. Too many lifters do that and they end up either getting injured or not having the performance gains they wished to have. You always want to make sure you are in the proper set-up to be able to do things properly so you can get the most work done.
Stay strong. Stay healthy.
You may also like:
A nationally ranked powerlifter, who has won several national titles with USA Powerlifting (USAPL), Dr. Michael is also the former Vice President of USAPL and Chairman of the Sports Medicine Com-mittee. He was the Head Coach of the USAPL World Bench Press Team for eight years, winning the 2004 World Championship Team Title. His best competition lifts are 705lb squat, 535lb bench press, and 635lb deadlift with a best combined total of the three lifts of 1,840lbs in the 275lb weight class. After Dr. Hartle retired from competing in powerlifting for 20 years, he started playing semi-pro football as a defensive tackle. He played for 10 years and loved it. His football team, the Adams Coun-ty Patriots, won the National AA Semi-Pro Football Championship in 2008.
He loves sports, especially football, track and field, and drag racing and enjoys hiking, camping, travel-ing, and the outdoors. He also enjoys writing exercise science/training articles for strongfirst.com in his spare time. Additionally, Dr. Hartle wrote a chapter on barbell training for Dr. Craig Liebenson's book, Rehabilitation of the Spine, 3rd edition. His first book was published in September 2023 by Human Ki-netics, titled Kettlebell Strength Training Anatomy.
He treats, trains, and advises all kinds of patients: babies, the elderly, youth athletes, NCAA student-athletes, and professional athletes. He has coached junior high football and track and field, volunteering his time, for 16 years. He has three sons and three grandchildren who keep him busy with their personal endeavors, including hockey, baseball, football, lacrosse, track, field and, of course, academics.

Amazing article. Such details and contrasts. Deliciously informative.
A very informative article.
I’m getting back into weightlifting but am finding that my progress is being hindered by the rack mobility issues, specifically in the wrist, mentioned in the early part of this article.
Does anyone have any pointers for finding information on the mobility exercises that will help me rectify this problem?
Doc, do you think it would be a good idea to do the Smolov Squat Program A’s fronts squats instead of back squats?
awesome article just wish there were picks to go with it
Thanks for the article!
Good gracious. All this amazing detail about the barbell front squat makes me wanna do the SFL cert for that alone!
Great article, Doc!
Thanks for an excellent discussion of the Front Squat.
Where does the Zercher Squat fit in with these variations of the Front Squat. In my gym I generally lead people through a progression from Goblet Squat to Zercher Squat to BB Front Squat – and then let them decide for themselves which variation “fits” them best.
I like the Barbell Front Squat because it fits in very well with my favorite Bodybuilding leg workout – A front Squat / Back Squat Super-set.
When I went from Olympic-style Weightlifting to Bodybuilding the Front Squat stayed with me.
I did the SFL in Sweden just last week and i can say DO IT =)
I have been doing barbell work for 30 years doing Bodybuildning and i thought i know this stuff pretty good but shame on me, I learned so mush that it changed my way of looking at the barbell =)
Mr Hartle knows his stuff.
Great article! Are there any pics or videos of the three variations you spoke of in your article?
This was an amazing article Dr Hartle! I enjoyed it very much and I would love to see more articles by you. I hope you enjoyed Sweden!