Our most recent program at Queensland Kettlebells has included a lot of floor presses, with good reason. If you haven’t encountered the floor press before, think of it as a bench press performed on the ground. Although the two lifts are similar, the floor press requires a few technical adjustments and also offers some new and useful opportunities.
Firstly, for most people, the floor press uses a shorter range of motion, as your elbows can only pull back until they hit the ground. Secondly, your whole frame is supported by the ground, meaning that you have fewer options for creating a stable lifting posture. Finally, you have to load your implement (kettlebell, barbell, dumbbell, or whatever) at the bottom of the movement, as opposed to starting from the top.
As you will see shortly, these are all factors you can use to make both your bench press and your military press stronger.
The Twin Arches for Strength
When performing bench press or floor press, I cue my students to draw their shoulders down and back, and really drive their upper back diagonally down, almost as if they’re trying to slide along the ground.
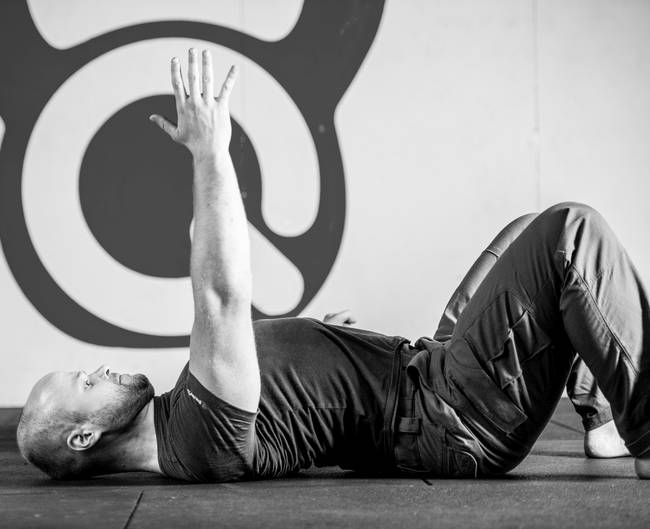
When someone does this correctly, you’ll notice they get two very pronounced arches through their upper back. One runs along the spine, and the other perpendicular to it, across the shoulders. These are important for both health and performance.
As a quick aside, cueing the shoulders down and back applies to horizontal movements, because it helps to stabilize the whole shoulder girdle structure, but should be avoided for vertical pulling or pushing because it impairs the scapula’s necessary upward rotation.
What’s Happening in the Arches?
I’ll let QKD’s exercise physiologist, Brent Cunningham SFG, fill in the details:
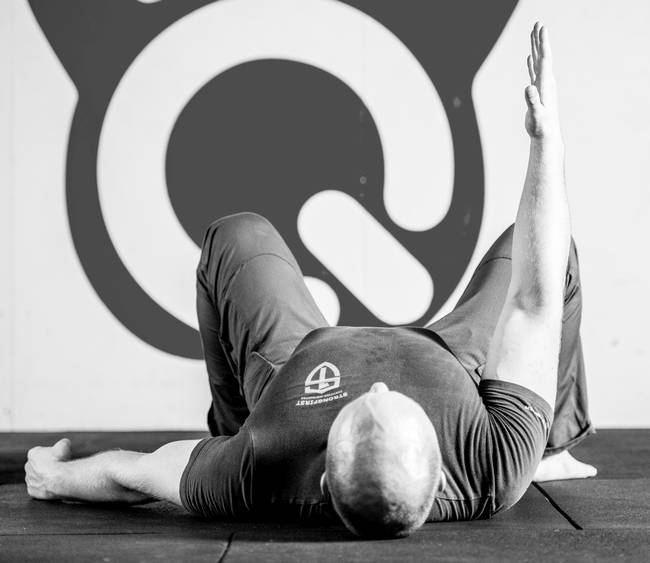
The longitudinal arch has been created by extending the thoracic spine (the opposite direction to where you’ll find it day-to-day). Extension of the upper thoracic spine is coupled with shoulder flexion and abduction, essentially permitting the shoulder to press with ease whilst mitigating any potential compensation or stress on surrounding structures.
The lateral arch indicates that you have effectively drawn your shoulder blades together and into the ground, creating a stable foundation from which you can press. Enter Newton’s third law: as you press the weight up, it is pressing back down. The platform you have created has provided you with a broad contact surface to dissipate that force pressing back and giving you the ability to leverage against it.
When these arches are present, and the glutes are clenched nice and tight to anchor the other end of the spinal arch, horizontal pressing movements noticeably improve. You may also find that many niggling issues tend to dissipate, as if by magic.
The Line of the Press
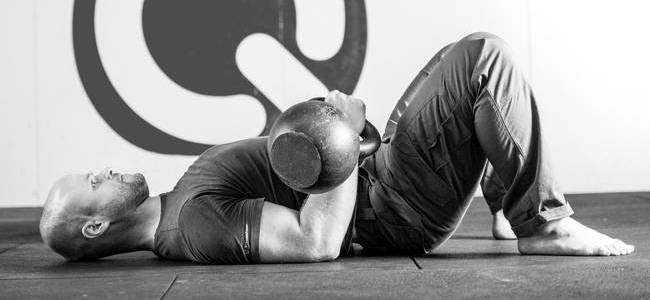
The next thing to consider as you perform your floor press is how you pick up and press the weight. The floor press can be performed in several ways, but we are going to focus on the single kettlebell variety.
As in the get-up, we teach students to pick up their bell by rolling over towards the bell into something resembling the fetal position; placing their lower hand all the way through the handle and gripping the bell; placing the other hand on top and rolling onto their back, keeping the elbows close to their body. This technique allows them to respect their body structure and safely move the bell from the ground into the floor press position regardless of bell size.
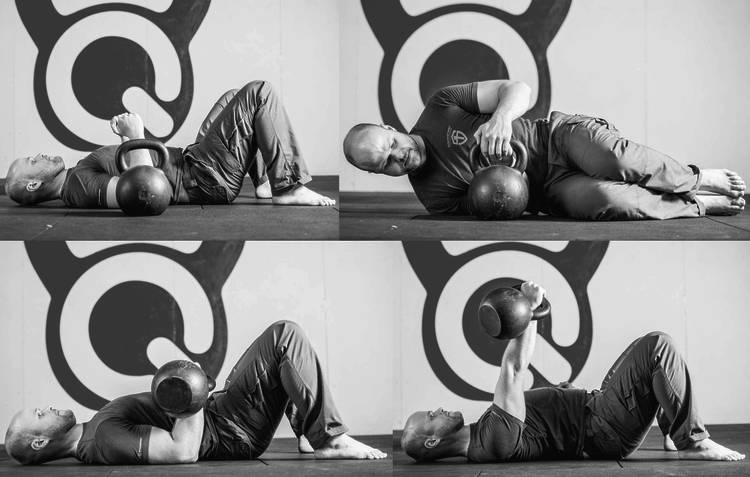
This sequence works best when the bell is in line with your elbow as you lie down. Why should it be in line with your elbow? Leverage. Imagine a large mechanical crane with a long arm and a small base. When the crane arm is vertical, any load hanging from it is directly over the base, pushing it straight down into the ground and creating stability. What will happen as the arm moves away from vertical? The load will no longer be over the base and the crane will likely topple.
The same thing happens when our bell is too high or too low on our body. We waste precious energy on stabilizing the bell; energy we could be conserving for driving the bell vertically.
Stacking the Load
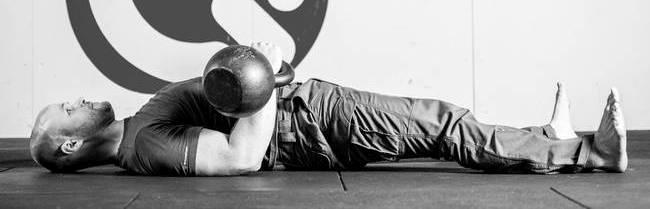
In almost any press variation, you want to focus upon keeping the center of mass situated above your elbow, with the majority of weight sitting on the heel of your hand below the little finger, in line with the ulna bone of your forearm.
This is beneficial because, as Shaun Cairns explained at the most recent SFG Kettlebell Certification in Brisbane, the ulna remains stable while the radius rotates about it. When we load weight over the ulna, we tend to access musculature that is better suited to driving the bell overhead in a solid, smooth, concerted fashion, than when we load other regions of the hand.
The goal with a floor press is for the bell to take the smoothest, best-supported line from the floor to lockout. By picking the bell up from a position level with your elbow, this becomes very achievable.
On the way down, if you focus on pulling the bell down with your elbow as far from your shoulder as you can, you should be able to reverse the previous motion in just as strong and smooth a fashion.
Three Lower Body Stances
When you perform the floor press, you can position your lower body in a few different ways, each of which provides different stimuli and opportunities.
Supine position
The weakest of the three positions. You have to work hard to establish the correct posture, and then you have to work hard to stabilize your frame as the weight is raised, particularly with a single bell. This disadvantage means that you learn to stabilize internally, something that you can later use to your advantage in the other two positions.
Hook position
This position is a bit stronger. Your pelvic position makes finding optimal posture easier, and because your feet are attached to the ground, you can actively use your legs to stabilize and drive.
Bridge position
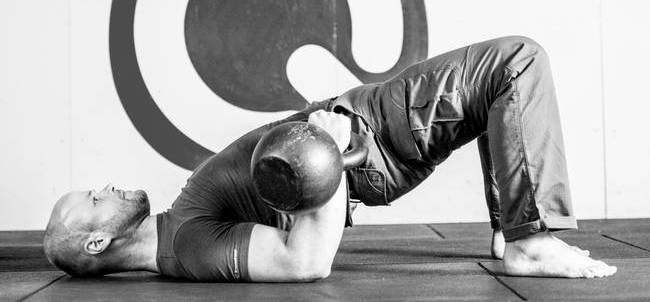
This position is also quite strong. You still have the foot position to support you, but your hip bridge facilitates the connection between your shoulders and head, and allows you to effectively drive the area beneath the load into the ground.
Each of these is an important and useful ‘same but different’ variation that should be practiced for maximum benefit.
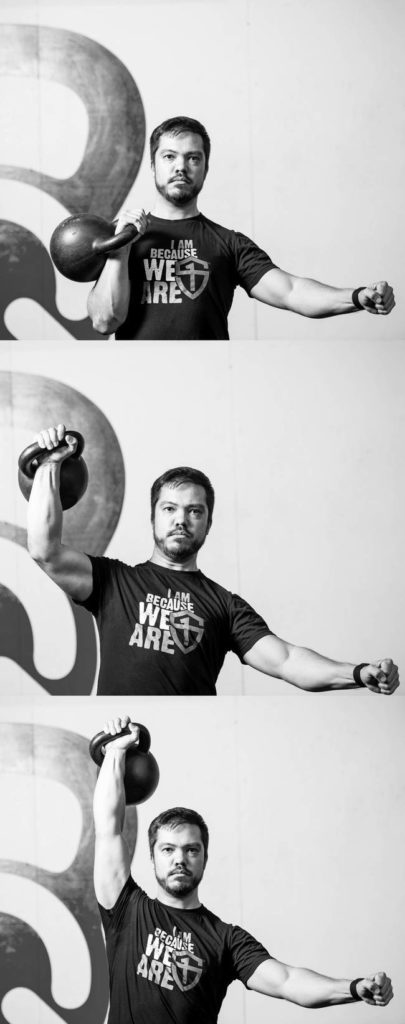
Pressing Overhead—The Real Meaning of Life
I used to joke that I only train so that I can military press until I’m very old. This is only partially true—I want to be able to do everything until I’m rather old—but I’m confident that the military press is an important part of the tapestry that will help me achieve that.
Fortunately, the floor press teaches us a few things that have a big impact on pressing overhead.
Your feet are connected to your hands
Actively driving your feet into the ground obviously improves the quality of your floor press, but it is equally important for the overhead press. Every action has an equal and opposite reaction, and for the military press, this action is happening beneath the soles of your feet.
The angle of your forearm is a big deal
One of the features of the floor press is to highlight your forearm’s angle by removing a lot of the other considerations found in an overhead press. If you use a sub-optimal angle in the floor press, the rep is unlikely to be successful, and the bell will stall or head back to the floor.
When you military press, your ability to compensate in a whole bunch of different ways hides this. However, in the long-term, these compensations will blunt your performance and leave you injured. The floor press is less forgiving and demands you learn a strong pressing groove.
Timing your irradiation matters
This is a big one. A lot of the time, when people military press, they either don’t harness irradiation or else they go wild with it way too early. Irradiation—the phenomenon that when you contract one muscle, the overflow of tension leads to contraction in neighboring muscles—is driven neurologically due to an increase in activity of the anterior horn cell at the spinal cord. This contraction overflow can increase universal strength, which is critical for big presses.
As the hardest part of the floor press is the beginning, you can easily learn to relax and contract (particularly with the opposite hand and the glutes) when you most need it. Once you learn to do this, you can then apply it to the sticking point in the military press—for most people, this is around when the bell passes their forehead.
If you can go from ‘kind of tight’ to super tight with your glutes and other hand, you’ll find that the sticking point will magically disappear.
Get Down to Press Up
The floor press is a fantastic movement that I think all lifters should practice, for a period at least. It is a strength-builder with positive benefits for shoulder and postural health in its own right. It will also make all manner of presses much better—and I’m pretty sure that’s why we’re all here, right?
With thanks to Melinda at Light Planning Photography and Barnabas Nagy SFG II for the images used.
You may also like:

His training philosophy focuses upon helping people to move well, and then to build strength to support people's quality of life - to borrow a phrase, "Strength Has A Greater Purpose."
Piers trains people out of Queensland Kettlebells, in Brisbane, Australia. A primarily group training based community where people look out for each other and get unusually strong.

Excellent insight into my weakest lift. I’ve got extremely long arms and benching usually irritates my rotator cuffs. Therefore I usually practice the floor press. Hopefully with your tips I can work on my bench again with greater safety and stability. Thanks!
This is great! I’ve been experimenting with floor presses into TGU for a while and it never quite felt right. This was the primer I needed to make it work and it is awesome. Thanks so much!
Awesome Pat. Thanks for commenting.
Thank You!
It’s like Christmas gift is waiting under the tree, few days earlier this time 🙂
Terrific…thank you Piers!