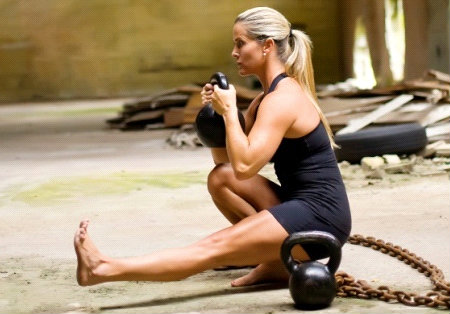
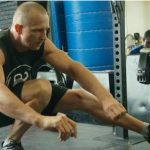
At StrongFirst, we pride ourselves in teaching progressions that will help every trainee and every athlete advance their technique and strength. All too often, we see exercises being done with poor technique—the pistol, in particular. Pistols require balance, mobility, flexibility, and strength. (Note: They also require spinal flexion, which makes them inappropriate for flexion intolerant individuals.)
The key to developing excellent movement is the continual application of assessment and correction. So let’s take a look at how this works with the pistol.
The Coaching Eye: Assessing Movement and Errors
As instructors, it’s important for us to do an assessment on each student’s movement in order to determine the best place to begin their pistol training. It is also useful to video your own movement for assessment if you do not have a coach or training partner.
The more students you watch, the better your coaching eye will become for the finer details of any given movement. I start my sessions by having my students perform a few baseline tests to set a starting point prior to having them do any stretching and/or corrective work. The flow should be that you set a baseline assessment, then apply correctives and/or stretches, and then retest the baseline between each corrective to see what works best to help your student improve.
It is important that you watch all joints when assessing a movement, especially in the pistols as there are many moving parts. A few examples of things I look at:
- The feet: are they staying rooted or are they pronating?
- The knees and hips: are they tracking the toes or wobbling?
- The spine: is it trying to stay too upright or is there excessive rounding?
Remember that pistols do require some spinal flexion and in most cases cannot be done with a completely flat back like we require for goblet or front squats, but we also do not want to see excessive hunching over either. For more details on how to perform a perfect pistol, read this article.
Below are the most common errors I see when watching people attempt to do a pistol. Some of these errors make it clear where the problem area lies, whereas others require further assessment.
- Heels rising off the ground as the student tries to hit a rock bottom pistol—in most cases, this means a lack of required ankle dorsiflexion.
- Reaching a rock-bottom position, but dragging the extended non-working leg—this indicates a lack of flexibility.
- Reaching a rock-bottom position, but not being able to return to standing—this indicates a lack of strength.
- Falling or rolling backward as you near the bottom range of the pistol—this indicates a lack of control. This inability to control movement can be caused by several things, though, and it will take further assessment to determine which correction is needed for each individual.
Setting a Movement Baseline for Pistol Assessment
Setting a baseline in a movement pattern is a great place to start for strategic improvement, and revisit for continued improvement. The preferred baseline test before working pistols is a feet together-knees together narrow squat, as it is safer to see if your student can get to the proper pistol depth on two legs prior to taking one away. Remember it is okay to regress to progress.
Instruct your student to stand with their feet and knees touching, then to pull themselves down into the deepest squat possible. Have them perform several repetitions in order for you to track the answers to the following questions:
- In this narrow squat position, what happens?
- They hit rock bottom and maintain control
- They hit rock bottom but roll or fall at the bottom
- They cannot hit the rock bottom position
- Have them perform the same squat drill with a light counterbalance, what happens?
- They can now hit rock bottom and maintain control
- They can get lower than before but still cannot reach rock bottom
- If they reached rock bottom with control, can they stand back up?
- They could not stand back up
- They could stand with bodyweight only
- They could stand with counterbalance only
Pay close attention to your students feet also, as their heels should stay down throughout the movement. If your student reaches rock bottom with their heels down and can return to standing, then you have a green light to move forward with all the pistol progressions. If they can only reach rock bottom while holding a counterbalance, then we need to do further assessments to determine your next step. At this point, you should check for the following in your student:
- Are they lacking ankle flexibility that limits the required degree of dorsiflexion?
- Are they lacking knee stability that causes them to experience valgus collapse?
- Are they lacking hip mobility or experiencing tight hip flexors?
- Are they simply lacking the required strength to stand back up? With or without a counterbalance?
Once you have the answers to all these questions, then you can move forward with your student and apply the appropriate correctives.
Corrective Movements to Prepare for Pistol Practice
Flexibility and Mobility Issues
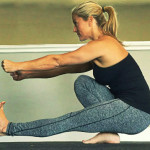
Watch this video for recommendations on flexibility and mobility drills:
If your student’s heels rise while attempting the pistol or the feet together-knees together narrow squat, then you should assign ankle mobility drills to increase their range of motion as part of their daily program. If the student is not able to achieve full depth, then you should assign daily hip mobility drills, as well as hamstring and calf stretches.
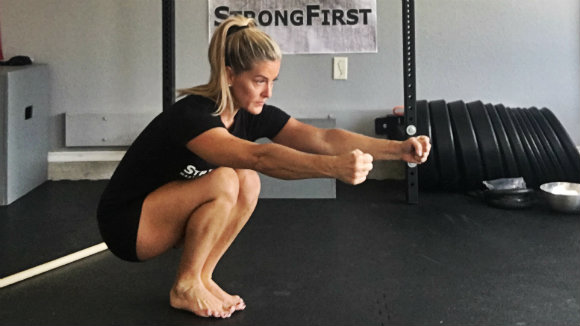
While they are working to increase ankle and hip mobility, your student can use a box elevation for pistol regressions. Have them lower under control to a set point without losing tension or resting on the box. As they begin to gain more ankle and hip mobility and hamstring flexibility, you can set a progressively lower elevation.
Balance, Control, and Strength Issues
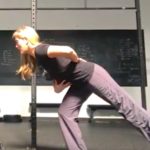
Watch the video for recommendations on balance and strength drills.
If your student is lacking in balance and control at the bottom, then assign the alternating leg drill from the rock bottom position while holding a counter balance. They should practice this drill until they can control the bottom and maintain tension.
Use a box elevation as a regression until your student increases their balance and strength. Have them sit on a box (or bench) completely relaxed, and then with a tension breath “zip up” their tension and stand. They should practice this until they can maintain that in both the top and bottom positions.
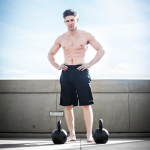
For a lack and balance and strength, single-leg deadlifts can be written into the student’s weekly program. Bodyweight single-leg deadlifts are important training for increasing balance, and should be done slowly and while barefoot to increase strength and proprioception in the feet. Weighted single-leg deadlifts are key to gaining strength. They can be done at a higher volume and with heavier loads than pistols and will result in less aggravation of the knees as well as quicker strength gains. They can also be used to wave the loads in your programming.
The Next Step in Pistol Progression
Once you have completed an assessment of your student’s movement and have assigned the proper correctives for each problem, you can have your student work a solid pistol or progression of the pistol for single reps done in a grease-the-groove fashion. You can do grease-the-groove pistols as a main program or it can be an accessory to another program by doing single reps throughout the day on days off from your conventional program.
With the grease-the-groove approach of focusing on perfect single reps, your student’s percentage of quality training will rapidly increase, and the resulting increase in their single leg strength will automatically increase their dual leg exercises. Not to mention all the gains they will experience in balance, mobility, and flexibility, as well.
Watch this video for a demonstration of the pistol with and without a counterbalance:
Remember, it is best to set a baseline prior to diving into a program with a new skill or a skill that is sub-par. By setting a baseline, you as the instructor will see what correctives or stretches your student needs. And if you video their baseline and re-test it from time to time via video, they will also be able to see how much they have improved from your training.
To learn more about developing excellent movement on a foundation of bodyweight exercise, register for a Bodyweight Course or an SFB Certification.
You may also like:
Karen currently resides in Dallas where she is available for private and group sessions. She is also available worldwide for distance coaching and program design. She travels regularly instructing workshops and StrongFirst Courses and Certifications.
She can be reached at karensmithmsfg@gmail.com or at her blog, Coach Karen Smith.


Thank you so much for these 3 videos and this awesome post! I was looking for a series of stretches to do in order to improve my pistol and OAPU. Incredible!
hi i am student of korea
your article is really help to my pistol
thank you
so i want to share this article for my friends
can i transfer and post this in my blog ?
A good look a Pistol Squat form analysis. I like to start my clients off with assisted pistols holding onto a pole and analyzing depth, forward movement of the knee, and overall balance. Not going deep enough or going ATG and using too much assistance from upper body is a good sign of lack of strength. The knee movement is actually a easy fix. I just have to tell them to push their hips back into the squat and make sure there is some horizontal pull on the pole. Balance is an issue fixed with more repetition. I’ve found that I can get all of my clients to progress to full Pistols, even weighted, after starting with the assisted Pistols.
You are só pretty and strong! Inspiring!
Nice vídeos as usual.
Thank you
Very good instructional video as well as breakdown and approach to correcting the problem areas. I seem to be able to do the feet/knees together squat for multiple reps ok and can load it for 10 reps with 60 lbs. Also able to do 1 leg to box at aprox. parallel. much beyond that and I tend to “fall apart” and lose tension. I think some of this will help. Much appreciate your valuable contribution.
Thank you, Don.
I always read an article or watch a video by Karen Smith.
I have the same problem as Don. Once I get much below parallel, it’s like my strength just disappears, especially on my right (weaker) leg. Thanks for this. I’ve recently been focusing on single-leg movements every workout, and I’m recording progress every week.