Serious strength is best built on a solid foundation of fundamental compound lifts, such as deadlifts, squats, and pressing. To ensure safety and maximize the benefits, that strength needs to be accessible across the movement’s full range of motion.
Since not everyone starts off with perfect mobility, here’s a simple strategy to make you stronger while also progressively improving your range, wherever you’re starting from.
Do you struggle to:
- deadlift without rounding your back?
- hit depth in any kind of squat?
- maintain your form throughout lifts?
- make progress in your bench press?
Read on, because this article is for you. Specifically, it’s intended for beginner and intermediate lifters who have trouble achieving the full range of motion in a safe manner in almost any lift.
Even if achieving a full range of motion isn’t your problem, these strategies may help you move more iron than you ever have before. I’ve written this from a coaching perspective with example loads typical for a complete beginner. If you are self-coached or lifting substantially more weight, the principles apply just as well.
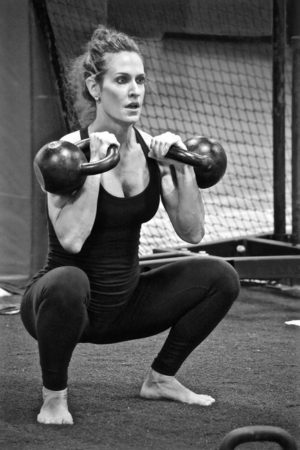
Strong Deadlift, Safe Swings
Imagine a new student expresses an interest in learning the swing. Since a good swing is built on a solid foundation (see Simple and Sinister to understand why), it’s here we often encounter a common problem—our student cannot yet perform a deadlift without rounding their back.
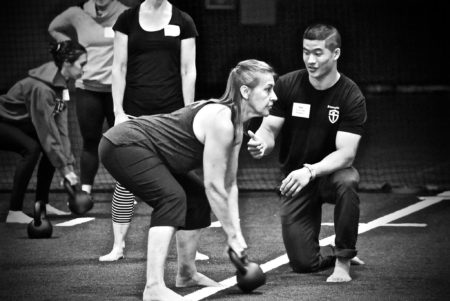
We know that maintaining a strong, neutrally-aligned spine is important for both the safety and maximum performance of our deadlift. If our student can’t do that yet, swinging is off the menu for now. What can we do to help?
The answer is simple: we will meet our student where they are. Of course, we’ll first try to coach them to maintain their spine with cues and drills. But if their issue is insufficient mobility, a solution is to raise the kettlebell off the floor.
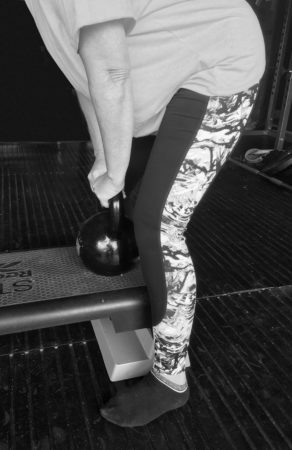
Instead of forcing them to come down to the kettlebell by any means necessary (i.e., rounding), we bring the bell to them by placing it on a box. This reduces the range of motion required for the lift. We’ll elevate the bell as high as needed to ensure our student is able to hinge at the hips while maintaining a strong spine and avoid any rounding that could be unsafe for their back under load.
Turn Up the Volume
Let’s say our student tries to deadlift a 24kg bell from the floor but can’t reach it without rounding their back. After testing several elevations, we determine that lifting the bell off a 12″ box allows them to complete a good, straight-backed, 24kg deadlift.
Now we come to the beautiful part—I find elegant program design pleasing. Our solution begins with our students becoming stronger by lifting heavier weights and greater volume but using the same elevation.
Why do we increase the weight for a lift in which, at the end of the day, we have no permanent interest—the partial
Once our student progresses, over a period of a few sessions, from a few 24kg deadlifts from a 12″ box to a greater volume (e.g., 5 sets of 5 reps), we will, in classic strength programming fashion, drop the volume and increase the weight. Now we ask our student to deadlift a 32kg bell from the same 12″ box. We aim for 3 sets of 3 reps to start, and work our way back up to 5 sets of 5 reps.
Take your Deadlift to New Heights
We can then test the principle of strength carrying over to nearby angles by asking our student to deadlift the 24kg bell from a lower, 10” box. We’ve increased the range of motion but decreased the weight.
Studies have shown that there will be a carryover of strength from a specific range of motion to a slightly greater range of motion. The strength carryover won’t be complete, and it won’t be there at all if we increase the range of motion too much. We will, therefore, literally inch downward.
If all goes well, our student keeps a flat back while deadlifting what is now a relatively light weight for them from an elevation they were unable to reach safely a few sessions ago.
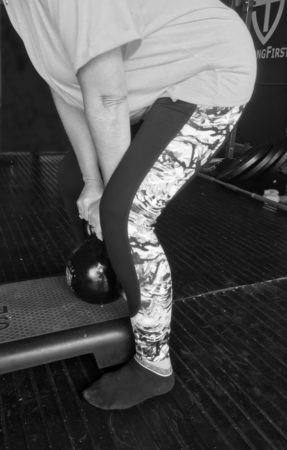
If they can’t, we go back to 12″ and increase the weight even more, cycling back the volume each time we increase the weight, before building it back up again. This time we might reach deadlifting a 36kg kettlebell for 5 sets of 5 on our 12″ box before returning to retry 24kg at 10″.
Repeat the process, which can be summarized as:
- Find your safe deadlift baseline weight and elevation
- e.g., 24 kg raised 12″
- Increase the volume progressively
- e.g., from 3 sets of 3 (9 total reps) to 5 sets of 5 (25 total reps)
- Increase the weight, drop the volume, and keep the same elevation
- e.g., from 24kg for 5 sets of 5 to 32kg for 3 sets of 3
- Repeat steps 2 and 3 above as often as needed
- Test for progress: drop the weight to your baseline while lowering the elevation slightly
- e.g., 24kg raised only 10″
- Drop the volume at this new range of motion
- e.g., return to 3 sets of 3
- Repeat steps 2, 3, 4, and 5 above as often as needed
Once the student can deadlift a heavy bell safely from the floor with no rounding, you’re ready to work on the kettlebell swing.
Improving Squat Depth
This strategy can also be applied to other lifts. Consider your squat, whether barbell, goblet, or double kettlebell front squat. If you can’t achieve the required depth with good form, go through the same steps.

Find the load and depth you can achieve safely and increase the volume. When you get to 5 sets of 5, lower the weight and
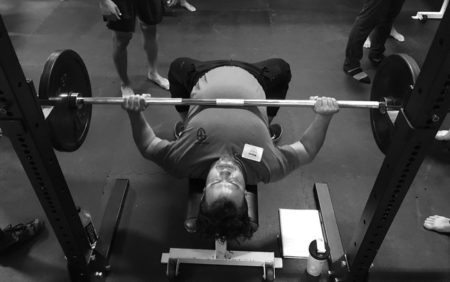
Busting Through a Bench Press Plateau
The specific mechanics of different lifts will require thinking through the principles above to see if they can be applied and how.
Take the bench press, for example: few people have difficulty lowering the bar to their chest (gravity is a great help). It is usually the bottommost position of the bar where people are weakest and uncomfortable.
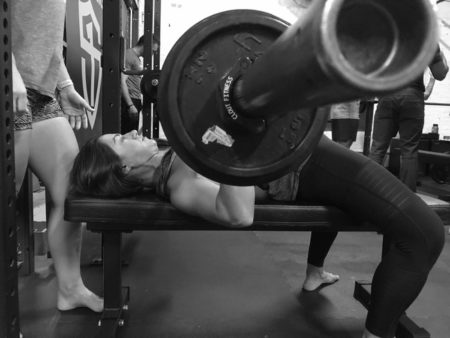
We can apply the same process as before to build greater strength at the top of the movement and gradually increase the range. This time, we can use layers of board on the chest to build strength at a reduced range of motion. As weight and volume improve, we can remove a board and repeat the process until the bar is eventually touching the chest once more.
Bench Press Plateau Buster #2
In an interesting twist, precisely because range of motion is rarely the weak link in the bench press, we can also turn our process upside down.
Instead of using heavier weights over a shorter range of motion as we did before, we can reduce the load and increase the range of motion by using a lighter pair of dumbbells or kettlebells. This allows us to physically lower the weight further than is possible with a straight bar.
From there, we can progressively increase volume, then increase weight, and finally, decrease the range of motion step by step until ready to use the barbell again. It’s the same process as before but standing on its head, if you will.
Full Range
The range of motion in many lifts can be considered another important, strategic programming variable, along with load, sets, reps, and rest periods. By intelligently progressing through a range of motion that’s not the same as the lift we’re targeting, we can accomplish great things and break through some of the plateaus we encounter as we perform the same lift, the same way, over and over in our training.
If you’d like to discuss how these principles may be applied to other lifts, please comment below or start a thread on the StrongFirst forum, where I have the honor to serve as administrator.
You may also like:
Holder of a doctoral degree in music, Steve is a former college professor and synagogue choir director, and a current church organist and private music teacher. He also instructs individuals and small groups in StrongFirst methods and practices in his basement gym. Steve recently set a national powerlifting deadlift record of 170 kg (375 lb) in the United States Powerlifting Association, Raw Division, male 65-69 year old age bracket, and 67.5 kg (148lb) weight class, which you may watch on StrongFirst’s Instagram here.
Steve administers StrongFirst’s online community at the StrongFirst Forum and invites you to join him there.

Thanks for the article! Do you have any tips on where to find boxes that can be stacked/adjusted to specific heights? I work at a gym & we currently stack plates to do this but it is kind of a hassle.
For the Bench Press, I highly recommend Bench Blokz. I use them and they work great!
Nice Article!
Thank you very much.
Very interesting article, Steve! I’ve never seen this strategy presented before. Thanks!
Thank you. It’s nothing new, just another variable one can adjust. If my memory serves, I first encountered it in Pavel’s “Power To The People!” where he spoke about lifters deadlifting outside, standing in a hole. This reduced the range of motion, and they’d gradually fill in the hole until they were standing on level ground.
Very interesting… thank you for the article. That’s very clear and opens up a lot of possibilities.
Do you think this principle can apply to the windmill ? (Increase the weight, then decrease the weight to increase the range of motion and going a little further) toward the ground)
Absolutely, although the way we teach the kettlebell windmill now in our SFG Certification, the range of motion isn’t an important variable. But if you’re doing a different kind of windmill and your goal is a larger range of motion, this can work, e.g., with a light weight, put your palm on the ground, then increase the weight and only touch your fingertips to the ground and work on gradually getting lower.